Table of Contents
1. Introduction to TV Wall Mounting
2. Understanding Different Types of TV Wall Mounts
3. Factors to Consider When Choosing a Mount
4. The Importance of TV Size and Weight
5. Wall Types and Compatibility
6. Aerial Force: Expert Installation Services
7. Step-by-Step Guide to Installing Your Wall Mount
8. Common Mistakes to Avoid During Installation
9. Maintenance and Adjustments After Installation
10. Conclusion: Elevate Your Viewing Experience
Introduction to TV Wall Mounting
Mounting a television on the wall can transform the aesthetics of a room while providing a better viewing experience. The right bracket not only enhances your space but also ensures that your TV is safely secured, reducing the risk of accidents. This guide will explore various mounting options available, important considerations for selection, and best practices for installation.
Understanding Different Types of TV Wall Mounts
When selecting a wall mount, it is crucial to understand the different types available in the market. These mounts generally fall into three categories:
1. Fixed Mounts
Fixed mounts are the simplest type, holding the TV flush against the wall without any adjustment capabilities. They are ideal for those who have a designated viewing area and do not need to change the angle.
2. Tilting Mounts
Tilting mounts allow users to angle the TV downward, making them suitable for installations that are higher on the wall. This feature helps reduce glare from windows and lighting.
3. Full-Motion (Articulating) Mounts
Full-motion mounts offer the most flexibility, allowing you to extend, tilt, and swivel the TV in various directions. This type is perfect for larger spaces where viewers may sit at different angles relative to the screen.
Choosing between these options depends on your specific needs, intended viewing height, and room layout.
Factors to Consider When Choosing a Mount
Selecting the right wall mount involves several critical factors:
1. TV Size and Weight
Ensure that the mount you choose can support your TV’s size and weight. Most manufacturers provide specifications indicating compatible sizes and maximum weight limits.
2. Wall Type
Consider your wall type (drywall, concrete, or brick) as this affects which mounting hardware you need. Some walls may require additional reinforcements.
3. Viewing Distance
Determine how far you will sit from the TV for optimal viewing comfort. A general rule is that the distance from the screen should be three times its diagonal size for HD TVs.
4. Installation Location
Think about where you want to place your television as this will influence both aesthetics and functionality.
5. Future-Proofing
If you plan on upgrading to a larger TV in the future, consider investing in a mount that can accommodate larger screens.
The Importance of TV Size and Weight
When assessing your mounting options, pay close attention to both size and weight specifications provided by manufacturers like Aerial Force. An improperly mounted television can lead to accidents or damage.
Measure your TV diagonally from corner to corner.
Check its weight by consulting product manuals or labels.
Choose a mount rated for more than your TV’s weight for added security.
This diligence ensures that your chosen bracket provides adequate support throughout its lifespan.
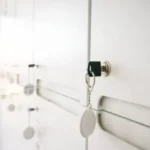
Wall Types and Compatibility
Different wall types require different approaches when it comes to mounting:
1. Drywall
For drywall installations, it is essential to locate studs using a stud finder since drywall alone cannot support heavy loads.
2. Concrete Walls
Concrete walls are more stable but require specific anchors and drill bits designed for masonry work.
3. Brick Walls
Similar to concrete, brick walls demand specific anchors and tools for secure installation.
Understanding your wall type allows you to select compatible mounting hardware effectively.
Aerial Force: Expert Installation Services
Aerial Force stands out as an expert provider of TV wall mounting solutions, offering professional installation services tailored to meet individual needs. Their skilled technicians ensure that each installation adheres to safety standards while optimizing viewing angles based on room layout and personal preference. By choosing Aerial Force, you benefit from years of expertise and a commitment to customer satisfaction.
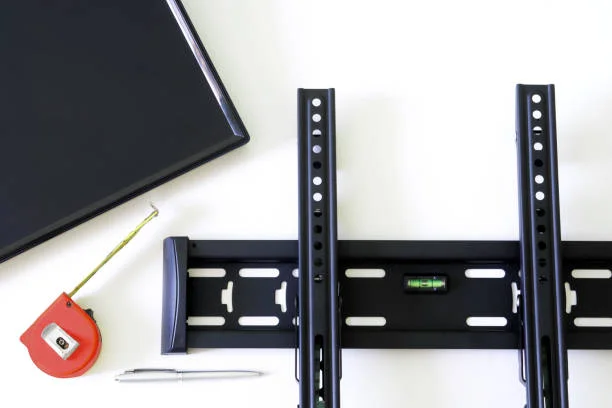
Step-by-Step Guide to Installing Your Wall Mount
Installing a wall mount can be straightforward if you follow these steps:
1. Gather Necessary Tools
Prepare all tools required for installation, including a drill, level, screwdriver, stud finder, and measuring tape.
2. Locate Studs
Use a stud finder to identify where you will secure your mount; mark these locations with a pencil.
3. Mark Drill Holes
Position the mount against the wall at your desired height while ensuring it is level; then mark where you’ll drill holes based on the mount’s screw holes.
4. Drill Holes
Drill holes into studs or walls according to selected anchors; ensure they are deep enough based on anchor type.
5. Attach Bracket
Securely attach the bracket using screws provided with your mount kit; double-check that everything is tight and level before proceeding.
6. Hang Your TV
Once the bracket is installed, carefully hang your television according to manufacturer instructions.
7. Organize Cables
Utilize cable management solutions or conduits for a cleaner look after installation completion.
Following these steps carefully will help ensure a successful installation process without unnecessary complications.
Common Mistakes to Avoid During Installation
Avoiding common pitfalls during installation can save time and potential damage:
1. Neglecting Stud Locations
Failing to secure brackets into studs may result in an unstable mount that can lead to accidents.
2. Incorrect Height Settings
Mounting at an inappropriate height can affect viewing comfort; always measure before drilling.
3. Skipping Level Checks
Failing to use a level might result in an unbalanced display that detracts from visual appeal.
4. Ignoring Manufacturer Guidelines
Each mount comes with specific installation instructions; deviating from these can compromise safety.
By being mindful of these pitfalls, you can ensure that your television remains securely mounted while providing an optimal viewing experience.
Maintenance and Adjustments After Installation
Once installed, regular maintenance ensures both safety and functionality:
1. Check Tightness Regularly
Periodically check screws and bolts for tightness; vibrations from daily activities can loosen them over time.
2. Reassess Viewing Angles
After usage over time, re-evaluate if adjustments are necessary based on furniture rearrangements or new seating arrangements.
3. Cable Management Review
Ensure that cables remain organized; replace any worn cables promptly for safety reasons.
By maintaining vigilance regarding these elements post-installation, you prolong both the bracket’s life and enhance your viewing pleasure significantly.
The right bracket not only supports your television but elevates your entire entertainment experience when done correctly with attention to detail and professional assistance from trusted providers like Aerial Force—making every movie night an occasion worth celebrating.