
To finish the process of refurbishing old furniture, decks or wooden floors, it is also among the best methods to strip off old finishes and rejuvenate the natural beauty of your wood using a wood finish remover. You may have the hardest-to-take-off varnish, lacquer, shellac, polyurethane, but a good wood finish remover will save hours of sanding time and provide a perfect surface to continue with a refinishing job.
Here in this guide, we are going to take you through the process step by step of using a wood finish remover safely and effectively such as preparation, application, and after cleaning methods.
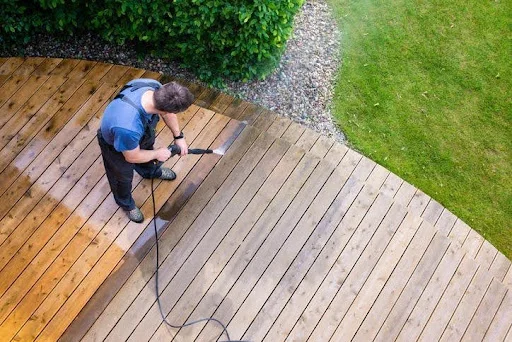
Learn how experts strip finishes fast while keeping your wood grain intact.
What Is a Wood Finish Remover?
A stripper (alternatively called paint or varnish stripper) is a chemical solution which is created to dissolve and remove old finishes on wood surfaces. These removers operate by dissolving the connection between the wood and the finish that is applied to it making the finish bubble up and then it is easily scraped away.
There are two main types:
- Solvent removers: These are very effective in thick or several layers of finish.
- Citrus or water removers: Are more eco-friendly and are applicable in the house, but could require more time to work.
What are the reasons for using a wood finish remover rather than sanding?
Although sanding is an ancient method of finishing removal, it is labor intensive and time consuming. More importantly, aggressive sanding may wear down the grain of the wood or it may change the shape of the wood. A wood finish remover:
- Saves time and effort
- Does not get rid of the original wood texture.
- Eliminates several layers at the same time.
- Cuts well on complicated carvings and edges.
Materials and Supplies
Prior to the commencement of the process, prepare all the tools required so as to make the process safe and smooth:
- Outdoor Wood finish remover (select on the basis of the kind of finish)
- Goggles and protective gloves.
- Respirator mask (highly the solvent based removers)
- Paintbrush or applicator
- Plastic scraper/ putty knife.
- Steel wool or abrasive pad
- Drop cloth/ plastic sheeting.
- Denatured ethanol or spirits made of minerals.
- Clean rags and water
Wood Finish Remover Step-by-Step Guide to application.
Step 1: Prepare the Work Area
- Start by selecting a place that is well-ventilated- preferably a place where there is open air or somewhere that has open windows and fans. Move plastic sheets or used newspapers to cover the areas around the floor and areas under the floor to avoid drip or stains.
- Put your piece of wood on a firm surface and ensure that it is clean.
Step 2: Run the Remover on a Small Area.
- First always apply a small inconspicuous spot of the wood finish remover. This makes you observe the reaction of the wood and the remover will not leave any discoloration or damages.
- Wipe lightly on the affected area and leave to rest within the suggested time and scratch lightly to assess.
Step 3: Wipe on the Wood Finish Remover Liberally.
- Apply a thick even layer of the remover on the surface with a natural-bristle brush. Do not brush it in clumps, but simply evenly.
- In the case of solvent products, a single coating might be sufficient. In case of water or environmentally conscious types, you may have to apply several applications.
- Allow the remover to steep 15-30 minutes (as indicated on the label). The finish will begin to blister and peel off the wood finish.
Step 4: Sandblast the Existing Finish.
- After the finish has melted, scrape it off very lightly with the help of a plastic scraper or a putty knife.
- Grain Working in the grain to prevent gouging. In the case of detailed areas, steel wool or a stiff brush should be used to remove the leftovers in the crevices and corners.
- In case there is still finish remaining on some areas, apply the remover one more time and do the same.
Step 5: Neutralize the Surface
The second step once the finish has been totally removed is to neutralize the wood surface. According to the remover taken:
- In the case of solvent based removers, wipe the surface using mineral spirits.
- In the case of removers that are water based, use a wet rag or clean water.
This process eliminates the remover chemical and prevents the reactivity of the remover further on the wood.
Step 6: Let the Wood Dry up.
- The wood must be left to dry at least 24 hours then sanded or refinished. Drying is done to the correct degree to ensure that the new finish does not have any water or chemical residue in it.
- So long as the surface is rough, a surface can be flattened by rubbing a light layer of the fine-grit sandpaper (220-grit) over the surface.
Safety Required to Wood Finish Remover
- Goggles and gloves should always be used in order to cover your skin and eyes.
- Avoid breathing fumes by working under ventilation.
- Never smoke or use open burning anywhere close to solvent-based removers; they are quite flammable.
- Waste disposal- do not pour any leftover remover in the drain.
The Safety Measures in the Use of Wood Finish Removers.
- You should always put on gloves and goggles to ensure that your skin and eyes are not exposed.
- Also work in a well-ventilated place so as not to breathe fumes.
- Never smoke or place open flames around solvent-based removers – they are very flammable.
- Waste disposal, leave the left over remover down the drain, no go.
Cleaning Up After Stripping
- After completing your project, you should dispose the left over remover and finish waste according to the local hazardous waste rules.
- Wipe down your tools with warm, soapy water (in case of water based removers) or mineral spirits (in case of solvent based removers).
Common Mistakes to Avoid
- Missing the test area: It is important to take the test area first before damaging.
- Over-scraping: This may cut or have scratches in the wood.
- Using excessive remover time: Excessive time may cause discolouring or destruction of the fibers of the wood.
- Omission of neutralization: Your new finish will not stick on well as residual chemicals can be present.
Advantages to Using Wood Finish Remover.
A wood finish remover that is appropriately applied has several advantages:
- Give the wood its natural timber back again.
- Eliminates deep lying finishes such as polyurethane or epoxy.
- Wooden prepares to be stained or painted.
- Conserves time and minimizes body movement.
- Contracts on outdoor and interior projects.
Conclusion: Bring Your Wood Back to Life
With proper use of a Hempshield product like Hempshield wood finish remover, it is possible to transform an aged and battered piece of wood to a smooth and finished surface. The trick is to do it with the appropriate remover, be cautious and exercise patience when doing so.
After being stripped and cleaned, now your wood is prepared to be stained, oiled or sealed-away to that natural finish that will be pleasant and last years.
FAQs
Q1: Is it possible to apply the wood finish remover to the painted wood?
Yes. There are numerous removers which are used to remove paint and clear finishes. Nevertheless, verify the label to see that they are compatible with the types of paint.
Q2: What is the maximum duration of time that I should leave the remover to be applied on the wood?
Normally, 15 to 30 minutes- however, it is always best to act according to the instructions of the manufacturer.
Q3: Is it possible to use a heat gun rather than a remover?
Yes you can, although you must be careful. Heat guns may burn wood or expel toxic fumes of old finishes.
Q4: Does it mean that I can tell whether all the finish has been removed?
When neutralized, wipe the surface with a clean rag. In case it looks to be tacky or shiny, it may leave behind some finish, reapply remover where necessary.
Q5: Is it possible to finish after stripping?
No. It should always be allowed to dry (at least 24 hrs) before any fresh finish or stain is put on.
Discover hidden insights that connect perfectly with what you just read.