
Outdoor areas are not confined to the backyards and patios but are an extension of your house. Such places can be made safer, more useful and attractive with the simple use of high-quality lighting. LED strip lights outdoor are one of the easiest ways to do so.
These lights are energy efficient, durable and can be used for pathway lighting, deck lighting, or for lighting the edges of a garden. They also have features such as dimming, color control and smart controls, which allow flexibility without the complex wiring. If you are a beginner when it comes to DIY projects, it is still not really hard to do the installation of these strips with the proper components and a little planning.
In a few steps, you can upgrade your outdoor space for both comfort and style.
Choosing Your Lighting System
Before you start taping pieces of strips everywhere, you should decide which kind of setup to use. There would be two main possibilities of controllers: a Zigbee controller or a WiFi controller. They are both modulated by remote for easier adjustments and a Zigbee system can be attached to a Zigbee Gateway in case you want to be connected to a smart home. Alongside your controller, you’ll need the LED strip itself.
Choose the length of the strip path and based on requirements plan the need of extension cable; 5 or 10 meters is generally recommended. Some setups may include a distributor if you’re splitting power between multiple sections. And don’t forget about your power supply. Depending on your layout, select 75W, 150W, 200W and or 320W just to ensure your lights work well.
Don’t skip this featured post—key ideas await to inspire your next step.
Prep Your Outdoor Space
Clean the areas in which you will be sticking your lights before you stick any strips. Dirt, dust and moisture all affect the adhesives negatively, which in turn will affect the life of your set up. Planning your layout in advance helps, too.
Choose whether your strips should be along railings, under steps, and garden edges, or highlight architectural features. It is also a time to test your power outlets and make sure that the cables will reach without creating tripping hazards. When it’s adequately prepared, everything else is easy.
Attach the Strips
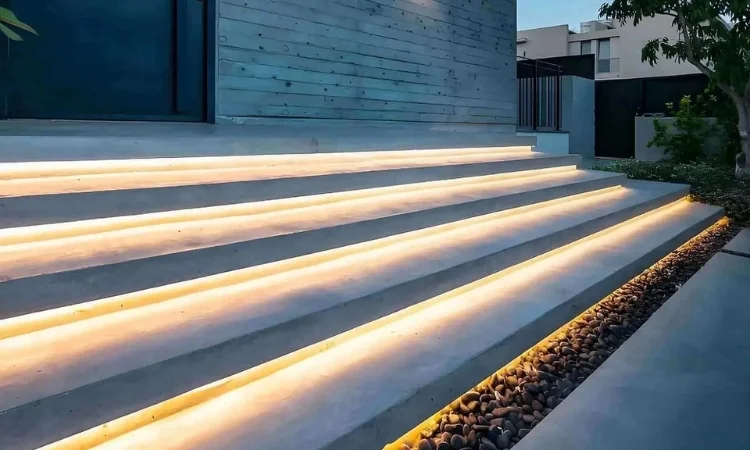
Now for the fun part. Most outdoor LED strips have an adhesive support, but in order to be used for a longer time, you may need some extra clips or brackets. Peel and stick slowly, keeping the strip straight and consistent. Sudden bends or stretching should be avoided at all costs as this may damage the LEDs.
Sometimes the outdoor edge lighting is done all along the border of a patio or deck, be sure that the strips walk the edges cleanly so that it looks professional and the lights up uniformly. For corners, connectors can be used to ensure that the lines are seamless. Bear in mind, patience here is a more desirable result.
Connect the System
Now it is time to connect up the strips to the controller and power supply. First connect the strip to the controller then the controller to the power supply. In case you have got a remote or smart setup, test the controls and then fix it in place. This is also the time to test dimming, color options and effects that might be programmed.
In case one of these sections is not lighting up, recheck connections and be sure that your total strip length does not exceed the power supply available. Even a little bit of troubleshooting would avert future headaches.
Finishing Touches
All things are linked together whereby you can conceal any additional wires using cable covers or clips. This does not only look cleaner it also keeps your set up in check of the weather and pets. Make a step back and admire your work.
Brightness and color can be adjusted to the required mood: a warm white during the evening, or a colorful burst when one has a party. And don’t forget that regular maintenance — cleaning strips and checking connections — keeps your lights looking and performing their best for years.
FAQs
Q: Can I install these lights myself?
A: Absolutely. Any person can install LED strip lights without any professional assistance with the right controller, power supply, and a very basic prep.
Q: How long do these lights last outside?
A: Most high-quality outdoor LED strips have a lifespan of between 30,000 and 50,000 hours, but weatherproofing and proper installation contributes to overall longevity.
Q: Can I control them with my phone?
A: Yes. When using a WiFi or Zigbee controller, you will be able to connect the strips with apps for remote control, scheduling, and color change options.
Q: What is outdoor edge lighting used for?
A: Outdoor edge lighting illuminates the pathways, stairs, patios, or garden sides and hence makes the areas more secure and attractive.
Q: Do I need a special power supply?
A: Yes. Make sure the power supply matches the total wattage of your strip length. This helps to avoid flickering or burning of your lights for LED strip lights.
Spotlighted for a reason—this featured posts at Management Works Media could change your perspective.