Before calling for AC repair, there are several simple checks you can do that might save you time, money, and frustration. Many homeowners panic when their air conditioner stops cooling, but the issue often lies in a minor setting, blockage, or overlooked maintenance task says Keyrenter Gilbert, one of the leading property management Chandler AZ company. By taking a few minutes to inspect your system, you can often spot small issues that are easy to fix without professional help. We will explore key steps you can take to troubleshoot your air conditioning system, ensuring it functions properly before you make a service call.
Dive into Related Posts crafted to spark ideas and keep you inspired.
Practical Steps to Take Before Requesting AC Repair
Check the Thermostat Settings
One of the most common reasons an air conditioner doesn’t turn on or cool properly is incorrect thermostat settings. Before assuming there’s a problem with your unit, make sure the thermostat is set to “cool” mode and not “heat” or “fan only.” Then, lower the temperature by a few degrees to see if the system responds. It’s also worth checking if your thermostat’s batteries are functioning—many modern models run on batteries that can quietly die over time. A simple battery replacement might be all that’s needed to restore your AC operation.
Additionally, verify that the thermostat display is working properly; a blank screen often indicates either a tripped breaker or drained batteries. If your home uses a smart thermostat, check if it’s connected to Wi-Fi and hasn’t lost synchronization with your HVAC system. Read more about simple ways to ensure your thermostat is correctly configured before requesting professional assistance. These small checks can quickly rule out simple issues before you reach out for professional service.
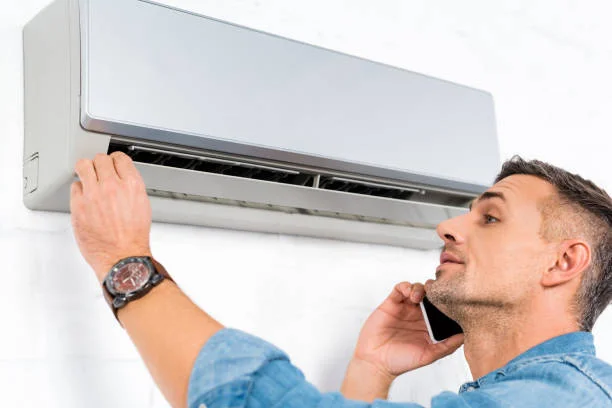
Inspect the Air Filter
A dirty or clogged air filter is one of the top causes of poor air conditioning performance. Filters are designed to trap dust, pollen, and debris, but when neglected, they can block airflow, causing the system to overwork or even shut down. Start by locating your air filter—typically found behind the return air vent or inside the indoor unit—and inspect it for visible dirt buildup. If the filter looks gray or dusty, replace it immediately. It’s generally recommended to replace or clean filters every one to three months, depending on usage and air quality. A clean filter not only improves airflow but also helps the system maintain efficiency, prevents overheating, and ensures even cooling throughout your home. Neglecting this step could cause your air conditioner to appear broken when it’s actually struggling to function properly due to a layer of dust.
Examine the Circuit Breaker and Power Source
Before assuming there’s a serious AC malfunction, always check your circuit breaker and power supply. A sudden power surge or overload can trip the breaker connected to your air conditioning system. Locate your home’s electrical panel and look for the switch labeled “AC” or “HVAC.” If it’s flipped to the middle or “off” position, reset it by switching it fully off and then back on. Also, confirm that the outdoor condenser unit’s disconnect switch, usually housed in a small box near the unit, is turned on. Another simple but often overlooked check is to ensure that your system’s power switch—typically located near the indoor unit—is not accidentally turned off. Many homeowners mistakenly attribute these simple power interruptions to equipment failure. By inspecting these areas first, you might avoid an unnecessary repair visit and quickly restore your home’s comfort.
Inspect the Outdoor Unit for Blockages
Your outdoor condenser plays a major role in cooling your home, and any obstruction around it can significantly affect its performance. Before calling for repair, step outside and examine the unit. Ensure there’s at least two feet of clearance on all sides and remove any debris, such as leaves, grass, or twigs, that may block airflow. Dirt buildup on the coils can also restrict heat transfer, making your AC work harder and less efficiently. If the coils look dirty, gently rinse them with a garden hose—never use a pressure washer, as it can damage the fins. Also, ensure the fan blades can spin freely and that there are no visible signs of ice buildup or leaks. Cleaning and maintaining the outdoor unit not only improves cooling efficiency but also prevents potential mechanical issues that can arise from overheating or restricted airflow AC Repair.
Check for Frozen Coils or Ice Buildup
If your air conditioner is running but not cooling, frozen coils might be the culprit. When airflow is restricted or refrigerant levels are low, the evaporator coils can freeze, preventing your AC from cooling properly. To check for this, turn off your system and inspect the indoor unit or the refrigerant line for ice or frost buildup. If you see ice, leave the system off to allow it to thaw completely—this can take several hours. Running your AC while it’s frozen can cause further damage. Once thawed, replace the air filter if it’s dirty and check for airflow blockages in your vents. If the issue recurs, it may indicate a more serious problem, such as a low refrigerant level or airflow imbalance, which should be addressed by a professional. Performing this simple check, however, can help you identify whether the issue is temporary or needs further attention.
Performing these simple checks before calling for AC repair can save both time and money while preventing unnecessary stress. From thermostat adjustments to cleaning filters and clearing outdoor debris, most of these tasks are straightforward and can resolve common performance issues. By taking a few minutes to inspect your air conditioner, you can often identify minor issues before they escalate into major repairs, ensuring your home remains comfortable and your cooling system lasts longer.
Take a deeper dive—Explore More articles that matter to you now.